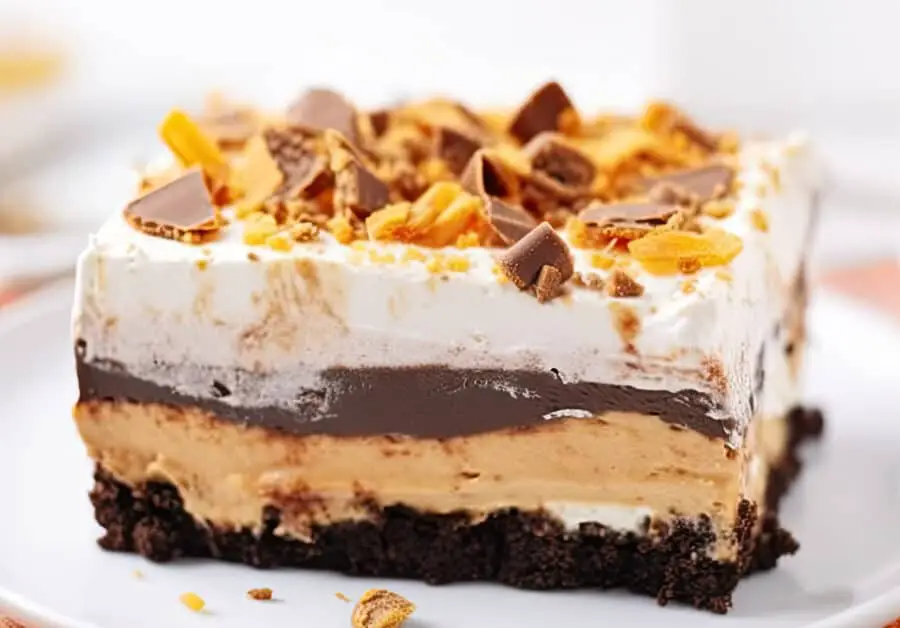
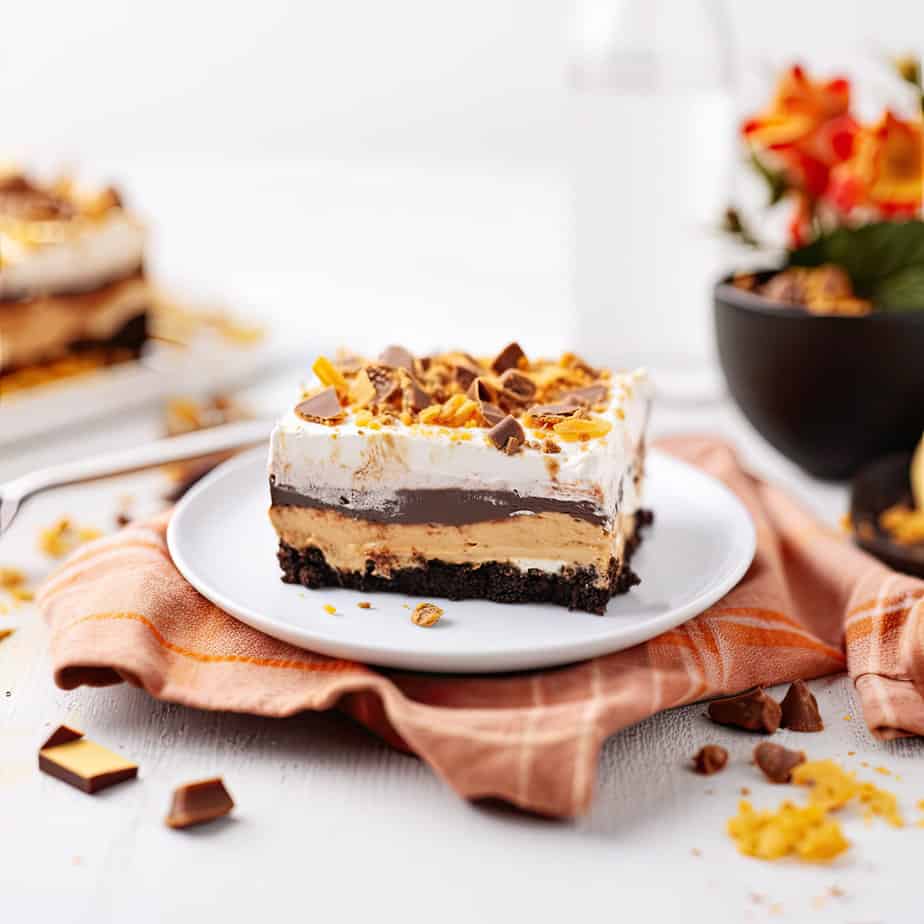
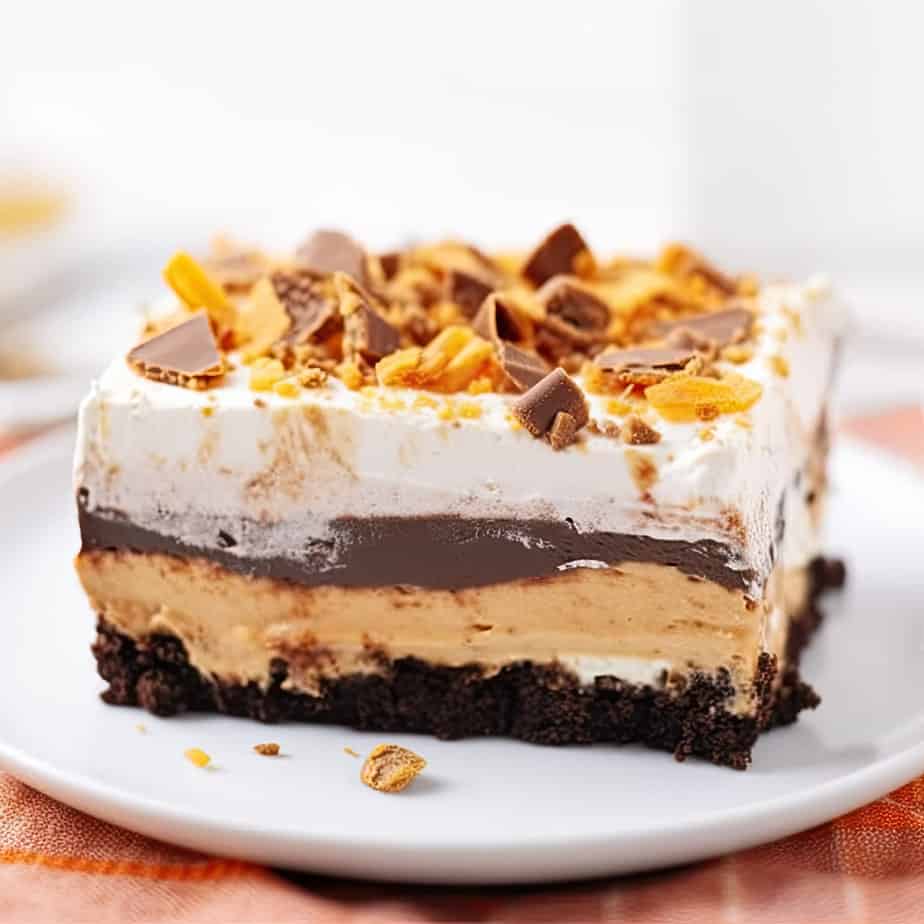
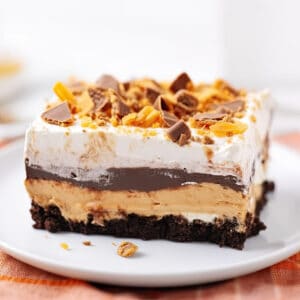
If you love chocolate and peanut butter then our No-Bake Butterfinger Lush is the dessert for you!
It combines two all-time classics – Oreos and Butterfinger candy into a sea of creamy decadence that will have you licking your lips in anticipation.
As great as that sounds, what makes this recipe even better is that it’s super simple and no bake!
I know I’m ready. Are you? Let’s dig in!
Ingredients You’ll Need
Crushed Oreo Cookies. Our Butterfinger Lush wouldn’t be the same without the scrumptious base of crushed Oreos. It not only provides a satisfying texture as the base layer but contrasts nicely with the smooth and creamy layers above it.
Melted Unsalted Butter. Think of the butter as like the glue that holds all those delectable crumbs together. Once it binds them, you’ve got a firm and delicious crust!
Cream Cheese. Adds that unmistakable tangy, creamy richness that pairs perfectly with the other sweeter layers of the dessert. A must have!
Creamy Peanut Butter. Can you even eat chocolate without peanut butter? Well, you won’t have to worry about that here because the peanut butter adds a nutty depth to the dessert, acting as a nice complement to the chocolate and adding yet more richness.
Confectioners’ Sugar. Adds smoothness to the cream cheese layer and enhances its already velvety texture once it’s fully mixed in.
Whipped Topping. If you love desserts with a lighter finish on the palate, then the addition of whipped topping is a must for this Buttergfinger Lush. It’s adds an airy layer to the treat which contrasts nicely with the more decadent, richer layers.
Instant Chocolate Pudding Mix. This is the perfect ingredient to really ramp up and intensify the deep chocolate flavor that makes this dessert so hard to resist.
Cold Milk. A must have to ensure that you’ve got the pudding mix from the previous step at just the right consistency.
Chopped Butterfingers. Last, but not least, the star of the show! They add the crunchy, chocolatey, and peanut-buttery goodness that brought you (and your cravings) here in the first place!
| Ingredient | Description |
|---|---|
| Crushed Oreo Cookies | Base of Butterfinger Lush providing texture and contrast to creamy layers. |
| Melted Unsalted Butter | Glue that binds Oreo crumbs for a firm crust. |
| Cream Cheese | Tangy, creamy richness complementing sweeter layers. |
| Creamy Peanut Butter | Nutty depth complementing chocolate. |
| Confectioners’ Sugar | Enhances smoothness and texture of cream cheese layer. |
| Whipped Topping/Cool Whip | Airy layer contrasting with richer layers. |
| Instant Chocolate Pudding Mix | Intensifies deep chocolate flavor. |
| Cold Milk | Ensures right consistency for pudding mix. |
| Chopped Butterfingers | Crunchy, chocolatey, peanut-buttery star ingredient. |

How to Make a Butterfinger Lush
Preparation. Crumble (or crush) your Oreos. You can also use a food processor if you have one.
Add the melted butter to the crushed Oreos and mix it together.
Firmly press the mixture into a 9×9 baking dish making sure that they layer is as even as possible.
Stick the baking dish in the fridge for about 20 minutes to allow the crust to set.
Creamy Layer. While the crust layer is setting, grab a large bowl. Mix the cream cheese, peanut butter, and confectioners’ sugar until it’s smooth.
Once consistency is right, add 2 cups of whipped topping. Fold it in to the creamy mixture gently. Get the Oreo crust from the fridge and spread the creamy layer on it.
Pudding Time. In another bowl, combine the pudding mix and cold milk. Whisk them together until smooth.
Set it aside for a few minutes to thicken. After, spread the pudding evenly on the creamy layer.
Final Touches. Add the remaining whipped topping to the dessert. Next, sprinkle the chopped Butterfingers. Gently press the chopped pieces into the whipped topping.
Chill and Serve. Now the hard part – waiting to eat it! Cover the dessert and refrigerate for at least 3 hours. Overnight is even better. When it’s time to serve your scrumptious treat, slice it into squares and try not to eat it all at once!
| Step | Description |
|---|---|
| Preparation | Crush Oreos, mix with melted butter, press into 9×9 dish, and refrigerate for 20 mins. |
| Creamy Layer | Mix cream cheese, peanut butter, sugar; fold in whipped topping. Spread over Oreo crust. |
| Pudding Time | Combine pudding mix with milk, let thicken, then spread over creamy layer. |
| Final Touches | Add whipped topping and sprinkle Butterfingers, pressing them slightly. |
| Chill & Serve | Refrigerate for 3+ hours or overnight. Slice into squares and serve. |
No-Bake Butterfinger Lush
Ingredients
- 30 Oreo cookies crushed
- ½ cup unsalted butter melted
- 8 ounces cream cheese softened
- ½ cup creamy peanut butter
- 1 cup confectioners’ sugar
- 3 cups whipped topping divided
- 5.1 ounces instant chocolate pudding mix
- 2 cups milk cold
- 3 ounces Butterfingers chopped
Instructions
Oreo Crust Layer
- Crumble (or crush) your Oreos. You can also use a food processor if you have one.
- Add the melted butter to the crushed Oreos and mix it together. Firmly press the mixture into a 9×9 baking dish making sure that they layer is as even as possible.
- Stick the baking dish in the fridge for about 20 minutes to allow the crust to set.
Creamy Layer
- While the crust layer is setting, grab a large bowl. Mix the cream cheese, peanut butter, and confectioners’ sugar until it's smooth.
- Once consistency is right, add 2 cups of whipped topping. Fold it in to the creamy mixture gently. Get the Oreo crust from the fridge and spread the creamy layer on it.
- In another bowl, combine the pudding mix and cold milk. Whisk them together until smooth.
- Set it aside for a few minutes to thicken. After, spread the pudding evenly on the creamy layer.
- Add the remaining whipped topping to the dessert.
- Next, sprinkle the chopped Butterfingers. Gently press the chopped pieces into the whipped topping.
- Now the hard part – waiting to eat it! Cover the dessert and refrigerate for at least 3 hours. Overnight is even better.
- When it's time to serve your scrumptious treat, slice it into squares and try not to eat it all at once!
Nutrition

Hi there! I’m Audrey, a dessert enthusiast and a self-proclaimed chocoholic. I’ve been baking since I was a little girl, and I’ve turned that passion into a career as a freelance writer. I believe that there’s always room for dessert, especially if it’s chocolate! When I’m not writing or baking, you can find me at the local farmers market or planning my next culinary adventure.